> For the complete documentation index, see [llms.txt](https://docs.hava.io/llms.txt). Markdown versions of documentation pages are available by appending `.md` to page URLs; this page is available as [Markdown](https://docs.hava.io/collaboration/workspaces.md).
# Workspaces
Organise your cloud infrastructure and control access using workspaces.
Workspaces are isolated areas within your Hava account. Each workspace has its own sources, environments, projects, reports, and alerts. Users only see the content of workspaces they have been assigned to.
A default workspace is created automatically when your account is set up. Owners and Account Admins can create additional workspaces and assign users and teams to them with specific [workspace roles](/collaboration/rbac.md#workspace-roles).
{% hint style="info" %}
Workspaces are available on all Hava plans. Assigning roles to workspace members requires a Teams or Enterprise plan.
{% endhint %}
## Creating a Workspace
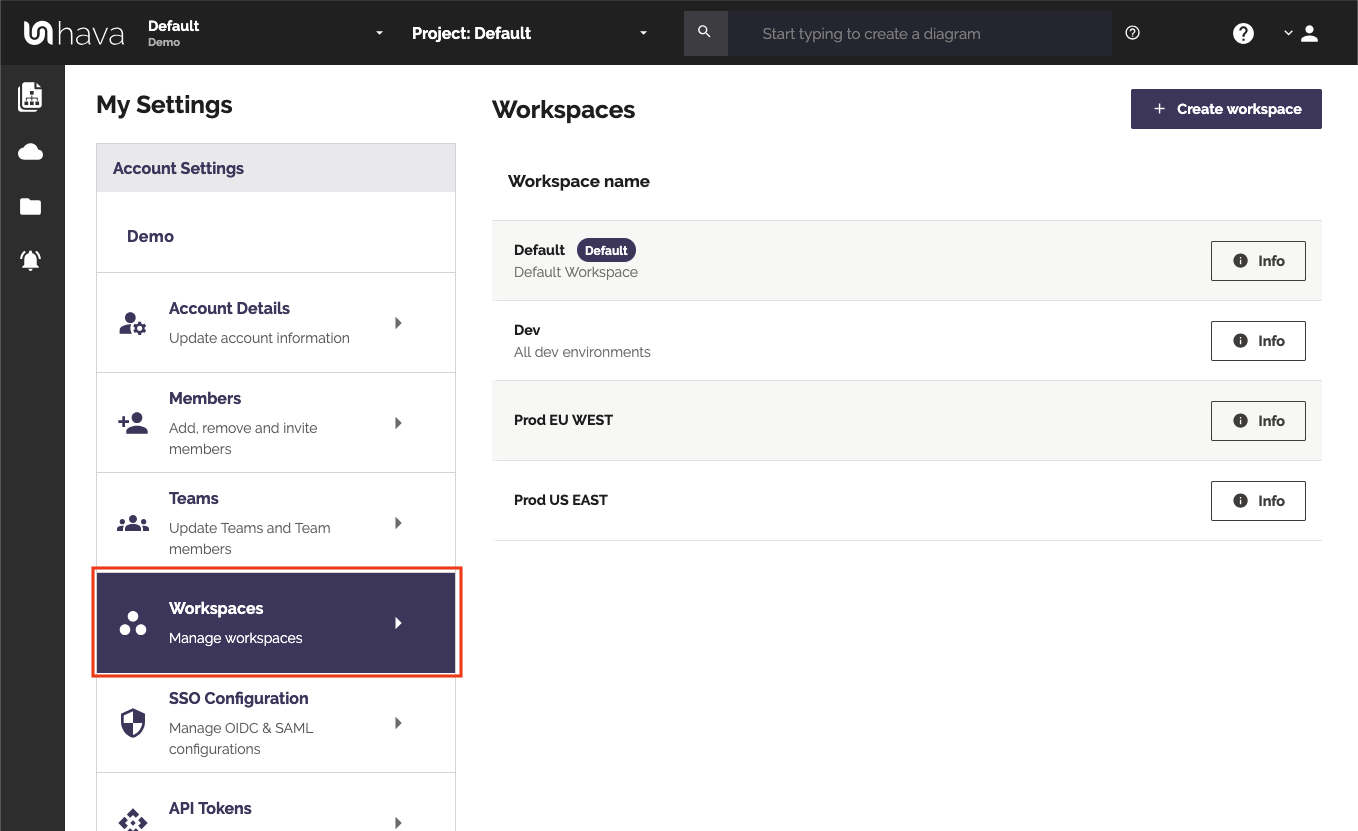
1. Click the user dropdown in the top right and go to **Account Settings**.
2. Click **Workspaces**.
Workspaces in Account Settings
3. Click **Create Workspace**.
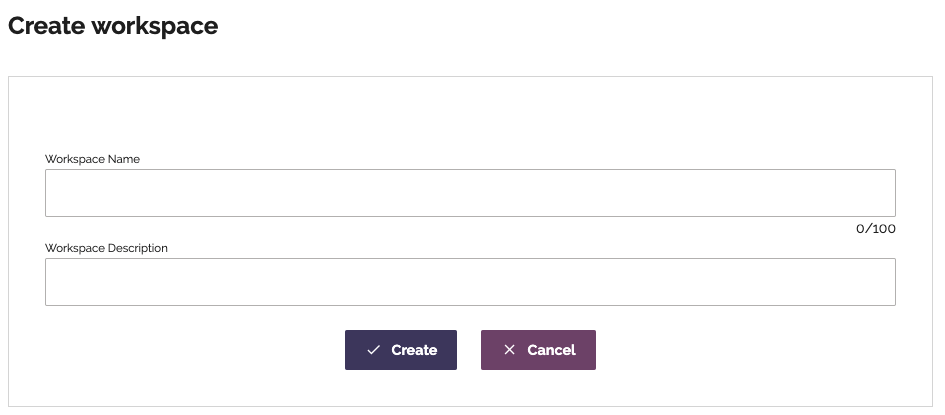
4. Enter a name and optional description, then click **Create**.
Create Workspace dialog
## Switching Between Workspaces
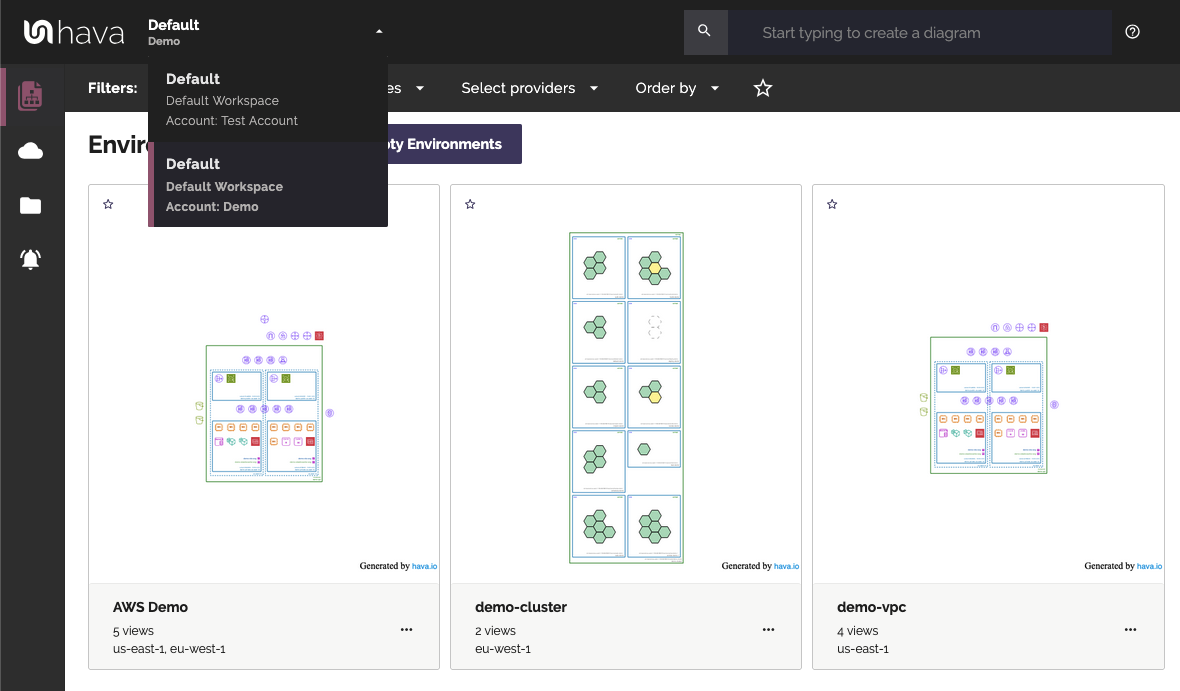
A workspace selector appears at the top of the page. Click it to switch to a different workspace. The environment list, sources, reports, and alerts all update to show the selected workspace's content.
Workspace selector
## Managing Workspace Members
Users and [teams](/collaboration/teams.md) can be assigned to a workspace with a workspace role. A user can belong to multiple workspaces, each with a different role.
### Adding a user to a workspace
1. Open **Account Settings** and go to **Workspaces**.
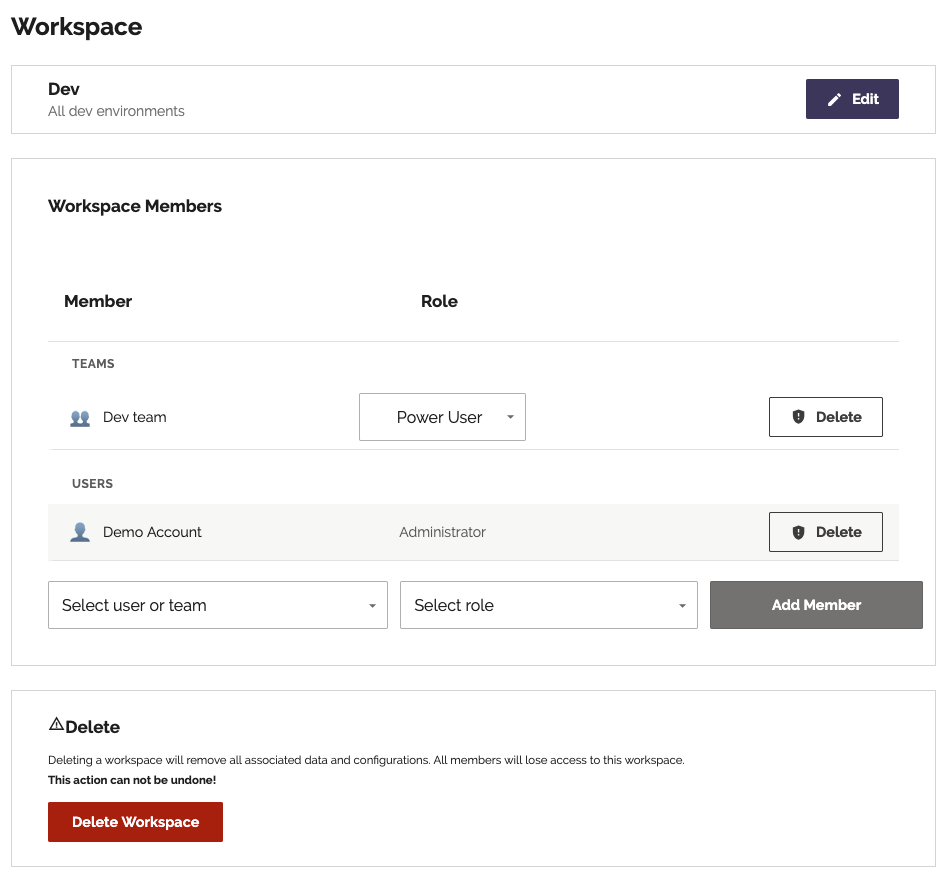
2. Click the workspace you want to manage.
Workspace detail page
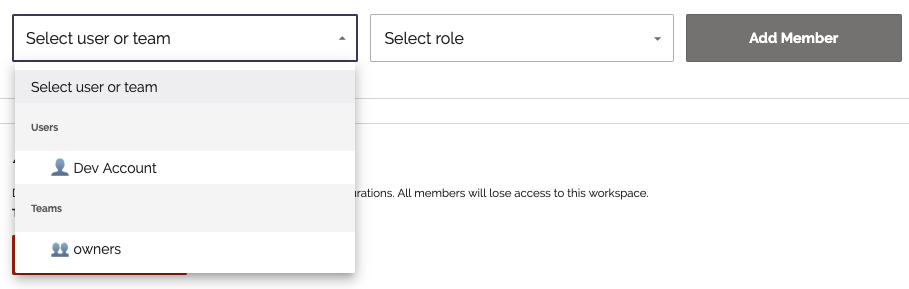
3. Under **Workspace Members**, select the user and choose their [workspace role](/collaboration/rbac.md#workspace-roles).
4. Click **Add Member**.
Add Member dialog
### Adding a team to a workspace
Adding a team assigns all current and future members of that team to the workspace with the selected role.
1. Open **Account Settings** and go to **Workspaces**.
2. Click the workspace you want to manage.
3. Under **Workspace Members**, click **Add Team**, select the team and choose the [workspace role](/collaboration/rbac.md#workspace-roles) to apply to team members.
4. Click **Add Member**.
If a user belongs to both a team and is also added individually to the same workspace, the highest of their two roles applies.
### Removing a user or team from a workspace
Open the workspace in Account Settings, find the user or team in the list, and click **Delete**. Removing a team from a workspace revokes access for all team members who were granted access through that team.
## Moving Sources Between Workspaces
If you have the appropriate role in two or more workspaces within the same account, you can move a source from one workspace to another. You need at least the **Workspace Power User** role in both the source workspace and the destination workspace.
Moving a source transfers all of its environments, resources, views, and associated data to the destination workspace.
1. Go to **Sources** in the workspace that currently contains the source.
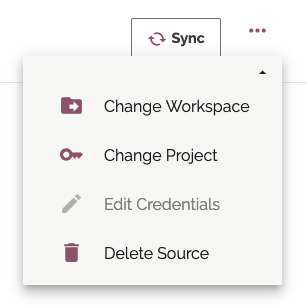
2. Click the '...' options menu next to the source you want to move.
Source options menu
3. Select **Change Workspace**.
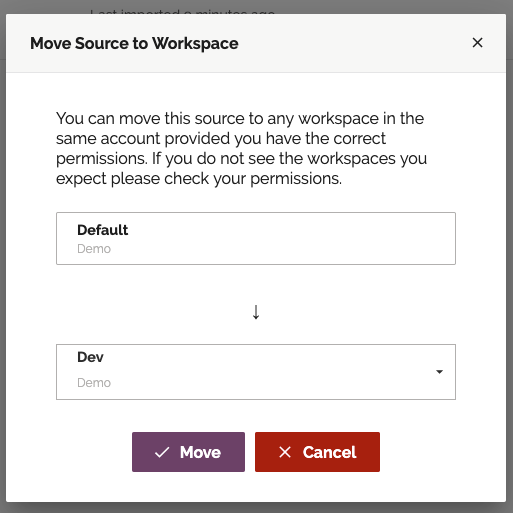
4. Choose the destination workspace from the list, then confirm.
Move to Workspace dialog
Hava will begin moving the source and all of its environments, resources, and views to the destination workspace. While the move is in progress the source cannot be synced or modified. You will be notified in the UI when the move is complete.
{% hint style="info" %}
Sources can only be moved between workspaces within the same account.
{% endhint %}
## Deleting a Workspace
{% hint style="warning" %}
A workspace cannot be deleted while it still contains sources. You must first delete or [move](#moving-sources-between-workspaces) all sources out of the workspace before it can be removed.
{% endhint %}
Only users with the **Workspace Admin** role (or an account **Owner**) can delete a workspace.
1. Open **Account Settings** and go to **Workspaces**.
2. Click the workspace you want to delete.
3. Click **Delete Workspace** and confirm.
## Workspace Roles
See [Roles & Permissions](/collaboration/rbac.md#workspace-roles) for a full breakdown of what each workspace role can do.
{% content-ref url="/pages/Ff6OolTl8NhPhYkcFohb" %}
[Roles & Permissions](/collaboration/rbac.md)
{% endcontent-ref %}